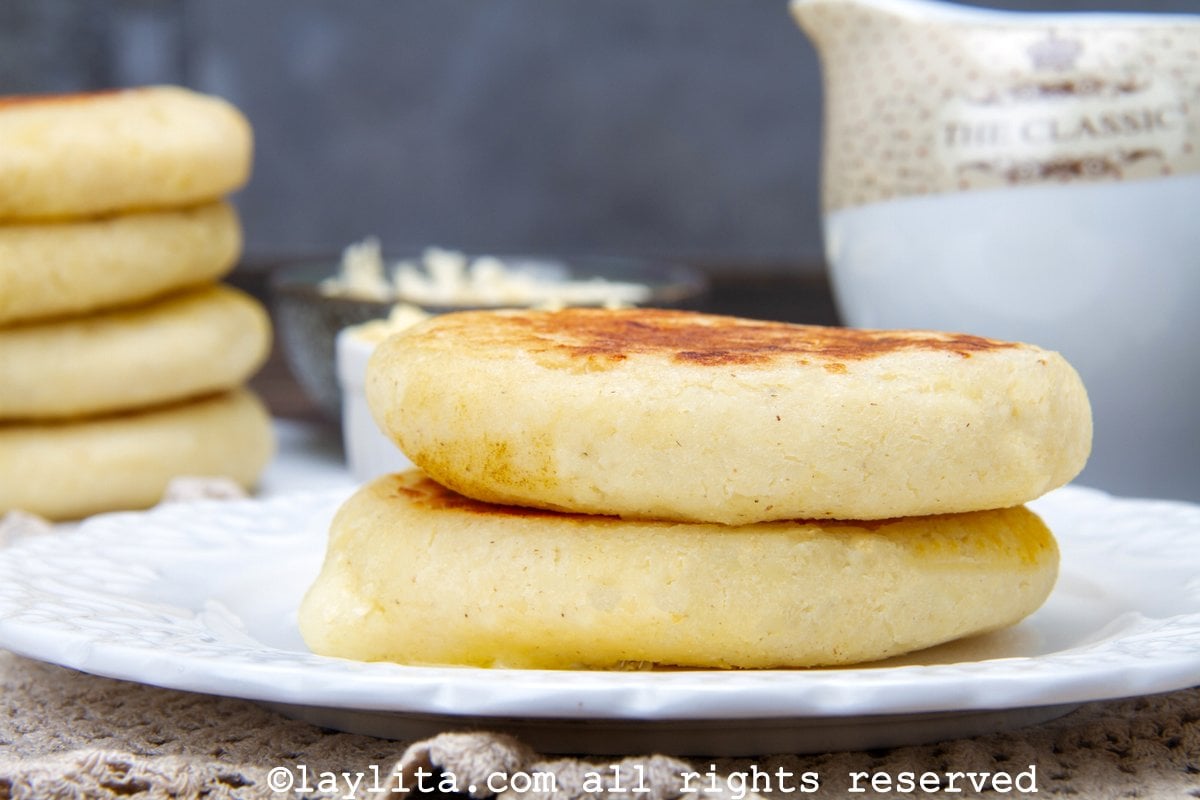
Colombian Cheese Arepas (Arepas de Queso)
Colombian Cheese Arepas are the perfect combination of crispy grilled corn dough and melty cheese, served hot off the griddle. Whether eaten for breakfast or as a quick snack, these stuffed corn cakes have become a beloved part of Colombian cuisine for good reason!

What are Colombian arepas de queso?
Colombian cheese arepas are griddled corn cakes made from precooked corn flour and two types of cheese – with some cheese added to the dough for maximum cheesy flavor. Unlike Venezuelan arepas, Colombian cheese arepas incorporate cheese directly into the dough, and are stuffed with cheese for a savory, comforting dish. While cooking, they develop a crispy golden exterior and a soft, cheese-filled center that stretches with each bite.

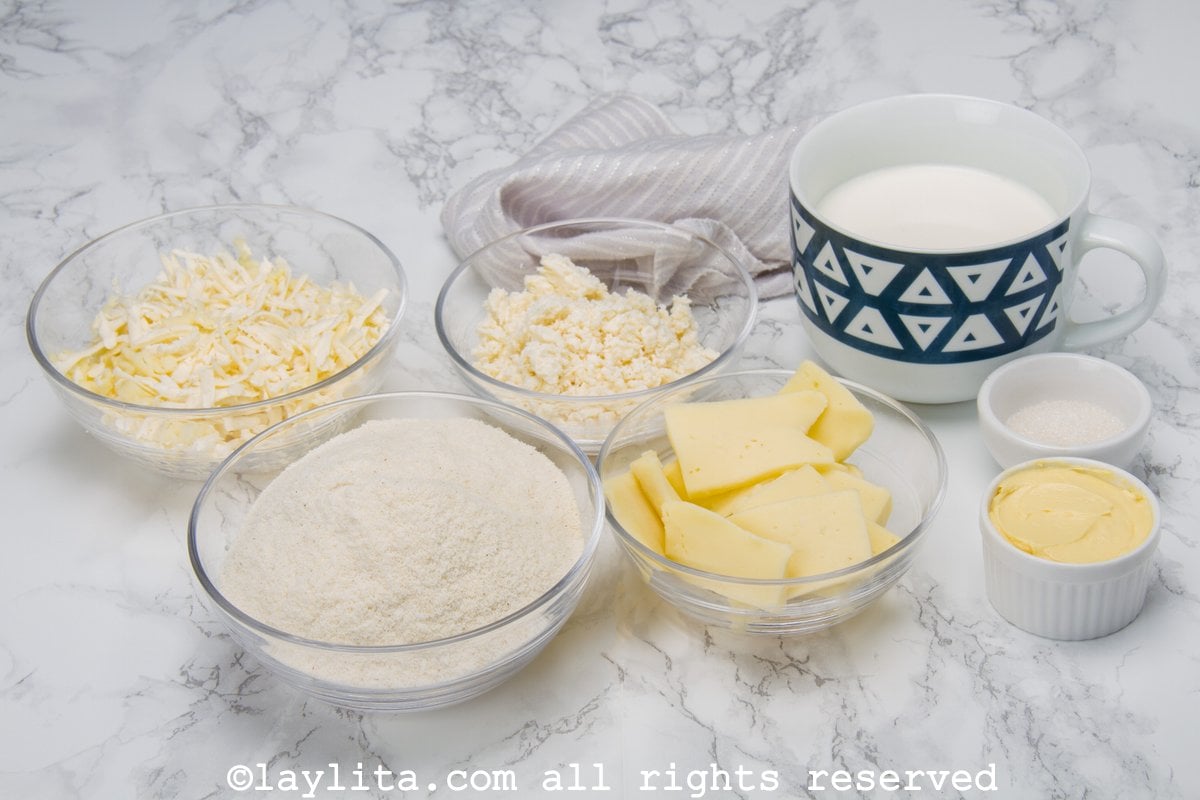
Ingredients for the cheese arepas
- Milk or Water: You will need warm milk or warm water to mix together the dough!
- Precooked Corn Flour: The foundation of any arepa, this special flour is called PAN and it is essential for achieving the right texture. Regular cornmeal won’t work as a substitute. You can find PAN arepa flour in most Latin grocery store and also on Amazon.
- Sugar: A little bit of sugar balances out the savory flavors and helps the Colombian cheese arepas to caramelize while cooking.
- Mozzarella Cheese: You will need both sliced mozzarella and shredded mozzarella cheese here. The shredded mozzarella will be added into the dough, and the sliced is used for the filling.
- Costeño Cheese: Colombian costeño cheese is a salty, crumbly cheese. If you can’t find it, you can use ricotta cheese with a bit of added salt, or shredded queso fresco.
- Butter or Oil: Use butter or oil to crisp up the cheese arepas in a pan!
How to Make Colombian Cheese-Stuffed Arepas
Colombian cheese arepas must be filled with cheese, and there are different variations in how the cheese is placed inside the arepa for this cheese arepas recipe. Here are the options:
- Option 1: Cook the arepa alone, without filling. In this case, first cook the arepa. Once cooked, split it open on one side to fill it like a traditional arepa. Then insert a slice of cheese, and return it to the pan over low heat until the filling melts. This is the simplest option.
- Option 2: The second option is to make two thin discs of raw dough, cut with a mold. Place a slice of cheese on one disc, and cover it with the other, making sure the cheese doesn’t leak out the edges. Perfect the edges of the arepa with your hands, then cook in the pan.
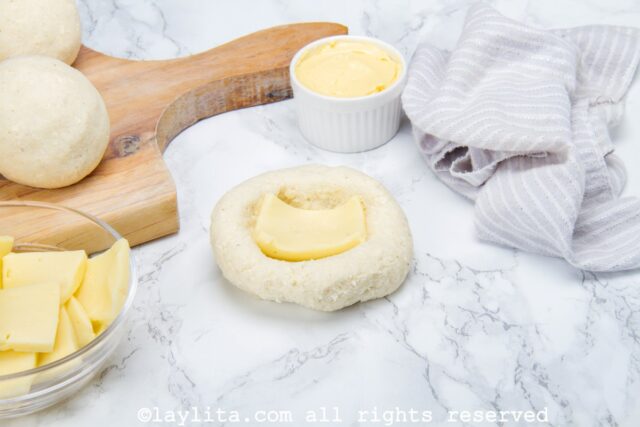
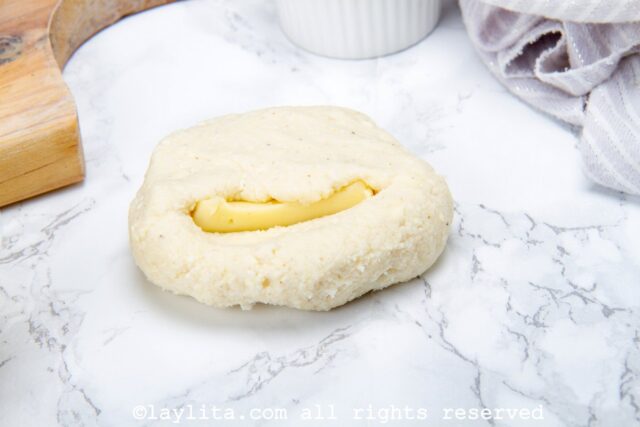
- Option 3: The third option is for those with more practical experience. If you already have experience making arepas or are skilled with your hands, this will be your option. Take a ball of dough, and flatten it slightly. Make a cavity in the center, place the slice of cheese, and bring the edges together until the cheese is sealed inside the dough and that’s it. In our photos, this is shown in detail.


Tips for Success
- Keep your hands slightly wet while shaping the arepas to prevent the dough from sticking. I like to keep a small bowl of water next to me so I can dip my fingers when I need to.
- Before stuffing the arepas, let the dough rest for 5 minutes after mixing to allow the flour to fully absorb the water.
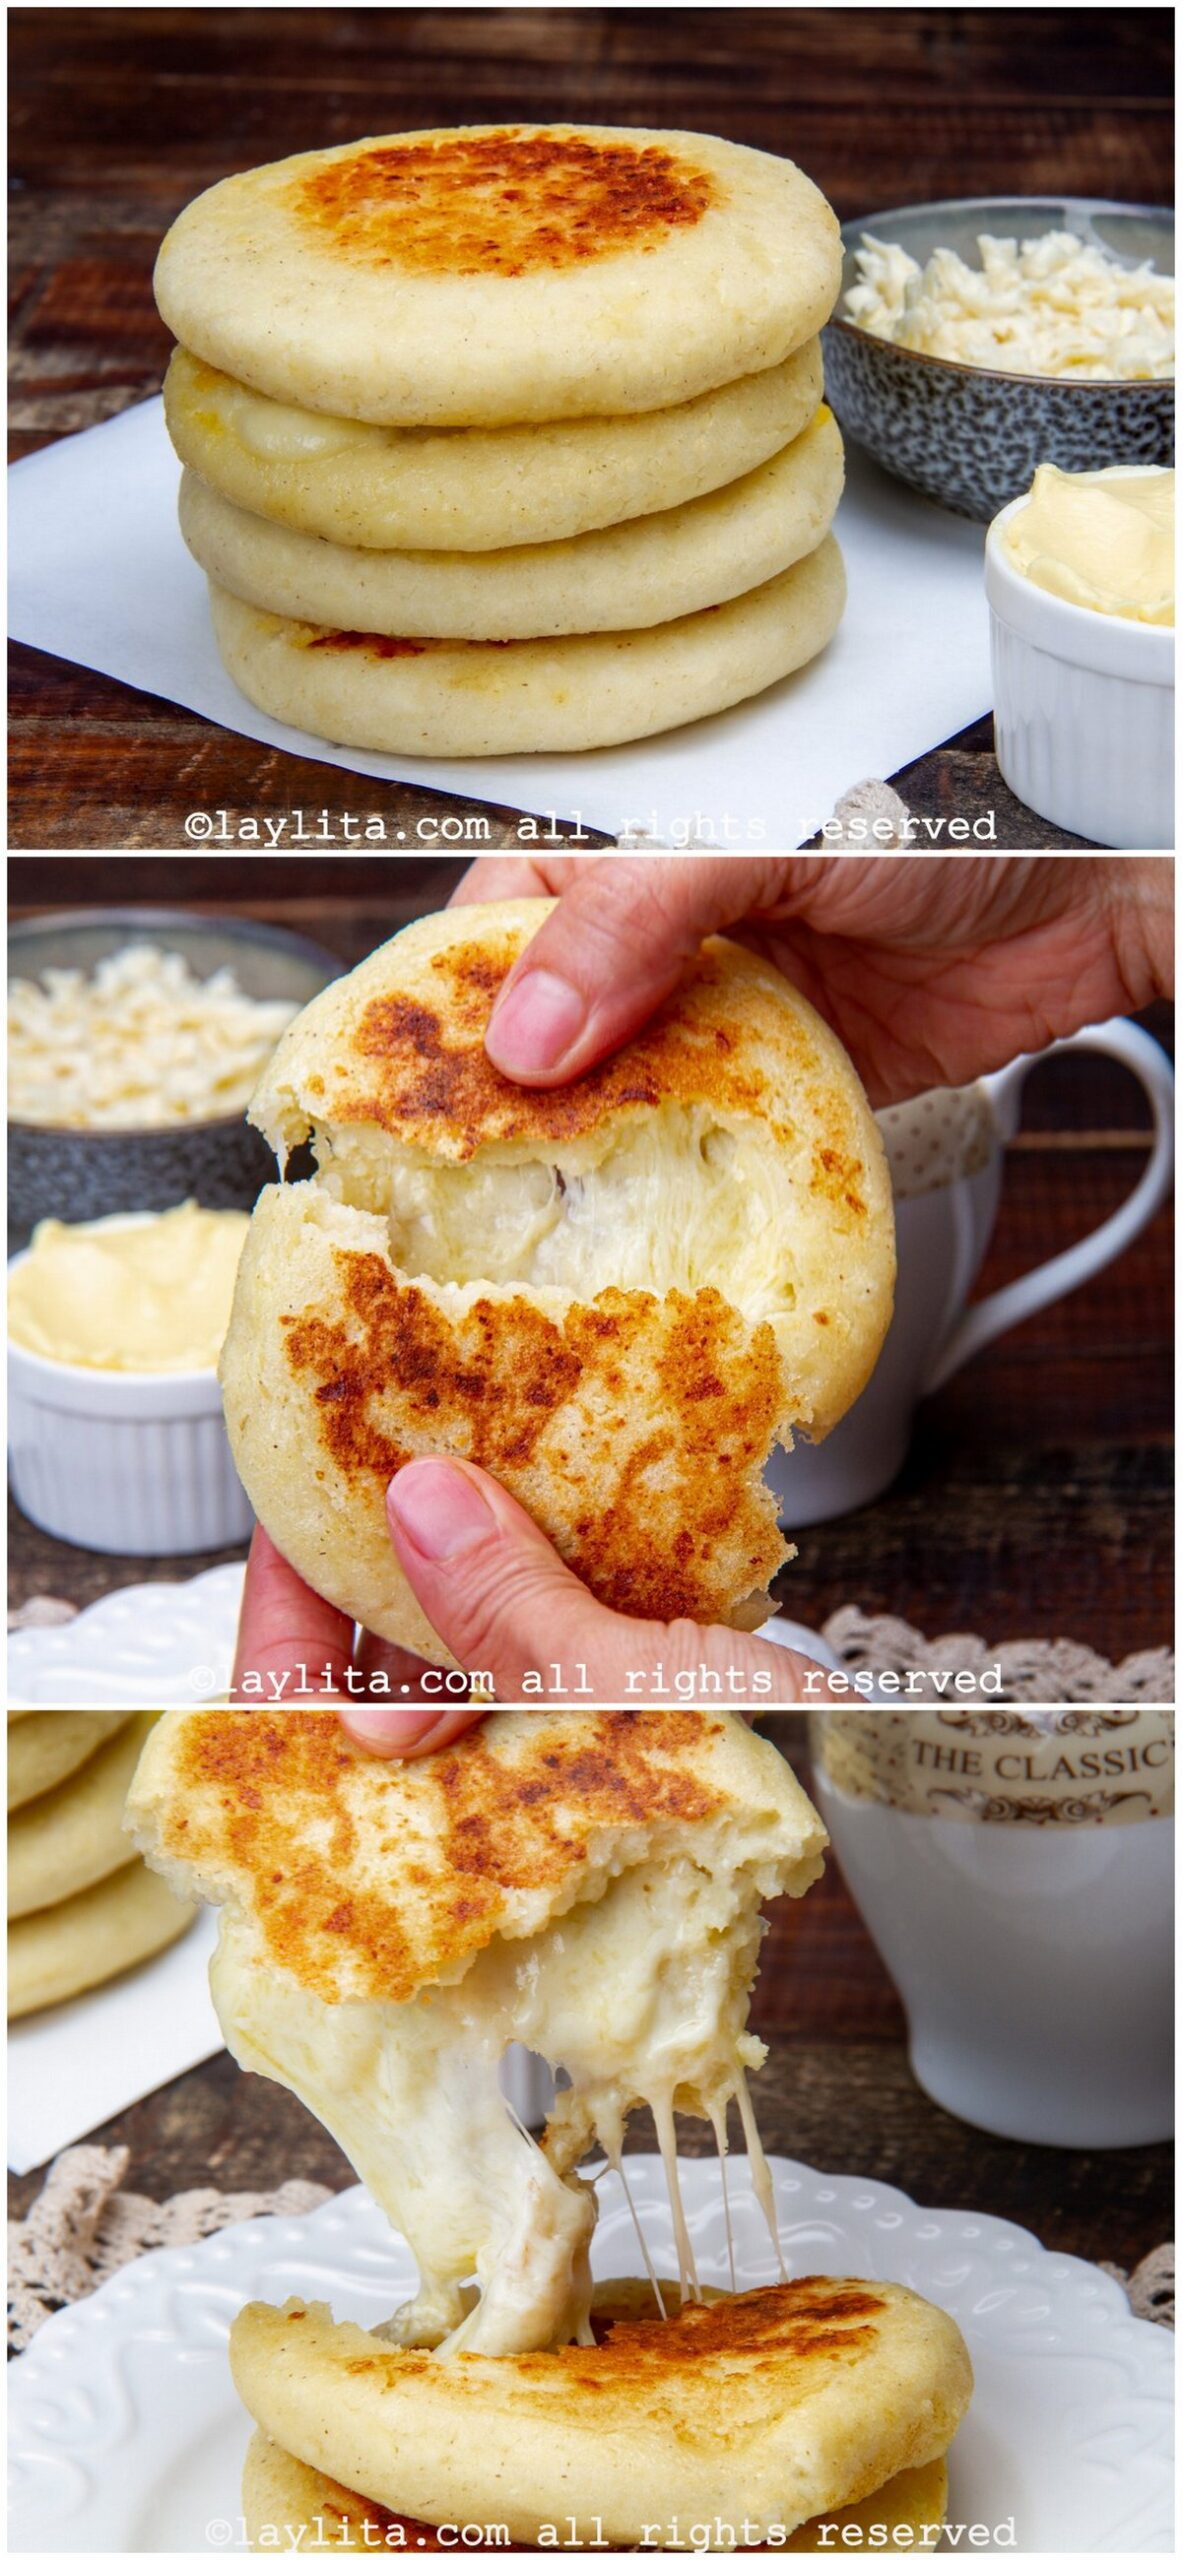
- Maintain medium-low to medium heat when cooking to ensure the cheese melts completely without burning the exterior! You want the outside to be a dark golden brown with a soft, melty center.
- Make sure your cheese filling is completely sealed inside to prevent leakage during cooking as much as possible. Of course, if there is a little leakage that is totally fine.

What to Serve with Colombian Cheese Arepas
Traditional accompaniments for these Colombian arepas include:
- Hot chocolate (the most traditional pairing)
- Fresh avocado slices
- Colombian-style scrambled eggs
- A side of hogao (Colombian tomato and onion sauce)
- Fresh cheese for topping
- Black coffee or café con leche

Storage Suggestions
While arepas are best enjoyed fresh off the griddle, you can:
- Store uncooked, shaped arepas in the refrigerator for up to 24 hours, separated by wax paper.
- Keep cooked arepas in an airtight container in the refrigerator for up to 3 days.
- Reheat in a skillet, air fryer, or toaster oven until warmed through and crispy again.
- Avoid microwaving as this can make them tough and chewy.

Colombian Cheese Arepas (Arepas de Queso)
Ingredients
- 1 ½ cup milk or warm water 350 ml.
- 1 ¾ cup precooked corn flour 250 g.
- 1 teaspoon sugar
- 125 g. grated mozzarella cheese
- 70 g. grated costeño cheese
- 125 g. sliced mozzarella cheese
- 1 teaspoon butter or oil
Instructions
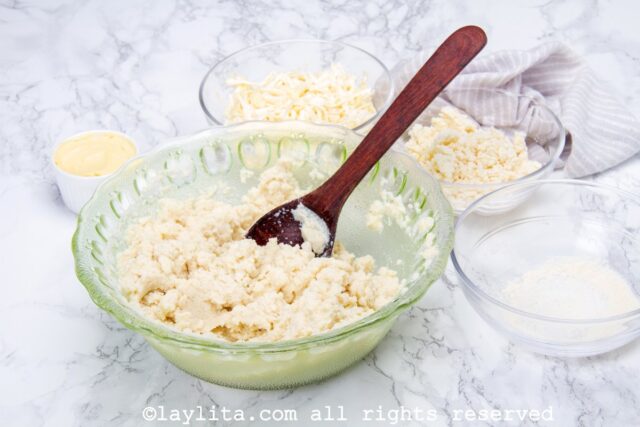
- Place the warm milk or water in a mixing bowl, add the sugar and dissolve. Then add the flour little by little. Stir first with a spoon, and then with your hands, until you have added all the corn flour.

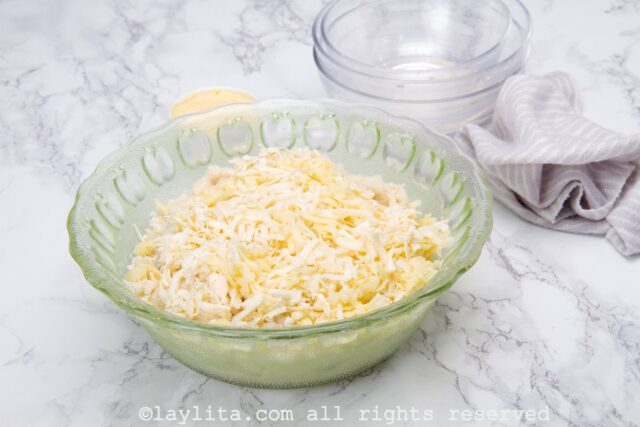
- Then, add the grated mozzarella and the grated costeño cheese. Knead very well until the mixture is homogeneous and moldable.
- Divide the dough into four portions of the same size, and form balls.
- Then take the first ball in your hands, and sink it into the center, as if you wanted to make a bowl of dough. Place a small slice of mozzarella cheese in the center.
- Then, bring the edges together on top, sealing the arepa.
- Using your fingertips, gently fine-tune any details and make sure the arepa has an even shape
- Melt the butter in the pan where the arepas will be made and spread the butter over the entire surface. Then, place the arepas in the pan to cook, about five minutes on each side.
- Remove from the pan and eat immediately. If you wish, you can place an extra slice of cheese on top.


Step by step preparation photos for Colombian cheese arepas:

More Recipes to Try


Discover more from Laylita's Recipes
Subscribe to get the latest posts sent to your email.